
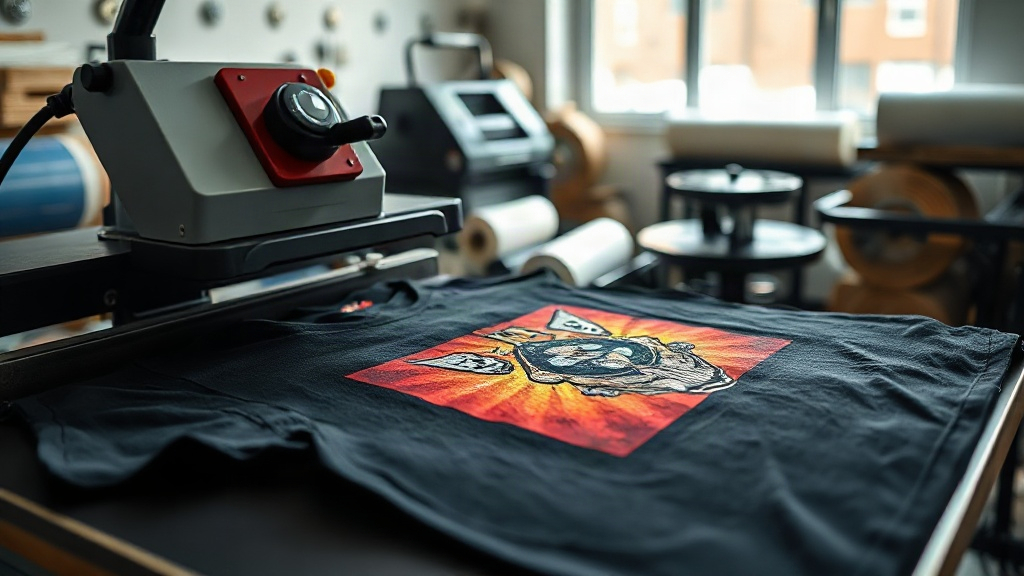
When you first hear about DTF Transfers, you might wonder if they are just another passing trend in the custom apparel world. But after pressing thousands of these transfers onto everything from cotton tees to nylon jackets, I can tell you they are a game-changer. Unlike traditional vinyl or screen printing, DTF transfers offer unmatched versatility and durability, making them a must-have for any print shop or DIY enthusiast.
In this guide, I will share everything I have learned from years of working with DTF transfers. You will learn what they are, how to choose the right ones, and how to apply them like a pro. Whether you are just starting out or looking to refine your skills, this article will give you the practical knowledge you need.
What Are DTF Transfers?
DTF stands for Direct to Film. The process involves printing a design onto a special PET film using water-based inks, then coating it with a powder adhesive. Once the powder is melted, the design is ready to be transferred onto fabric using a heat press. The result is a vibrant, stretchable print that bonds permanently to the material.
What sets DTF transfers apart from other methods is that they do not require weeding or masking. You simply print, powder, cure, and press. This simplicity makes them ideal for small businesses, hobbyists, and anyone who wants to produce high-quality custom items without investing in expensive equipment like screen printers or DTG machines.
Why Choose DTF Transfers Over Other Printing Methods?
There are several reasons why DTF transfers have become so popular. First, they work on almost any fabric. Cotton, polyester, blends, even leather and nylon can all be decorated with DTF. This is a huge advantage over vinyl, which struggles with stretchy or heat-sensitive materials, and over DTG, which typically requires 100% cotton.
Second, DTF prints are incredibly durable. When applied correctly, they withstand dozens of washes without fading, cracking, or peeling. I have shirts that have been through the wash more than 50 times and the print still looks new. That kind of longevity is hard to beat.
Third, DTF transfers allow for full-color, photographic-quality images. You are not limited to solid colors or simple logos. Gradients, fine details, and even small text come out sharp and vibrant. This makes DTF perfect for complex designs that would be difficult or impossible with other methods.
How to Apply DTF Transfers: Step-by-Step
Applying DTF transfers is straightforward, but following the right steps ensures a professional result. Here is my tried-and-true process.
Step 1: Prepare Your Workspace
Set your heat press to the recommended temperature, usually between 325°F and 350°F (160°C to 175°C). Prepress the garment for a few seconds to remove moisture and wrinkles. This step is crucial for a smooth, even transfer.
Step 2: Position the Transfer
Place the DTF transfer onto the garment with the printed side facing up. If your transfer has a clear carrier film, you will press it directly onto the fabric. Use heat-resistant tape if needed to keep it in place.
Step 3: Press
Apply medium to firm pressure for 10 to 15 seconds. The exact time can vary depending on your press and the transfer manufacturer, so always test first. After pressing, let the garment cool completely before peeling the film. For a matte finish, you can peel while hot, but I prefer a cold peel for maximum durability.
Step 4: Post-Press (Optional)
For added durability, especially on stretchy fabrics, cover the design with a Teflon sheet or parchment paper and press again for 5 to 10 seconds. This helps the adhesive fully bond with the fibers.
Common Mistakes to Avoid with DTF Transfers
Even experienced printers run into issues. Here are the most common pitfalls and how to avoid them.
- Insufficient pressure: If the transfer does not stick, it is often because the pressure is too low. Increase the pressure and try again.
- Wrong temperature: Too hot and the film may melt or the ink may crack; too cold and the adhesive will not activate. Always follow the manufacturer's recommendations.
- Peeling too soon: Waiting for the transfer to cool completely before peeling prevents stretching and ensures a clean edge.
- Not prepressing: Skipping the prepress can trap moisture, leading to poor adhesion and a bumpy finish.
By avoiding these mistakes, you will get consistent, professional results every time.
Choosing the Right DTF Transfers for Your Project
Not all DTF transfers are created equal. When sourcing transfers, consider the following factors.
Ink Quality
High-quality water-based inks produce brighter colors and better wash fastness. Cheap inks may look fine initially but fade quickly.
Adhesive Powder
The powder adhesive is what bonds the print to the fabric. Look for transfers that use a fine, even powder coating. Uneven powder can lead to patchy adhesion.
Film Type
Some films are designed for hot peel, others for cold peel. Make sure you know which type you have and follow the corresponding instructions.
If you are producing your own transfers, invest in a good printer, quality inks, and reliable powder. If you are buying ready-made transfers, choose a reputable supplier who provides detailed application instructions.
DTF Transfers on Different Fabrics
One of the best things about DTF is its versatility. Here is how it performs on various materials.
- Cotton: Excellent. The print bonds well and feels soft.
- Polyester: Great, but use lower temperatures to avoid dye migration. Consider a low-temperature DTF transfer if you are working with dark polyesters.
- Blends: Very good. The stretchability of DTF accommodates the fabric's movement.
- Nylon: Good, but requires careful temperature control to prevent melting.
- Leather: Possible, but test first. Use low temperature and light pressure.
Always test on a scrap piece before pressing the final garment, especially with specialty fabrics.
Washing and Caring for DTF Prints
To keep your DTF transfers looking great, follow these care instructions:
- Wait at least 24 hours before washing.
- Turn the garment inside out.
- Use cold water and a gentle cycle.
- Avoid bleach and fabric softeners.
- Tumble dry low or hang dry.
- Do not iron directly on the print.
Following these simple steps will extend the life of your prints significantly.
Frequently Asked Questions About DTF Transfers
How long do DTF transfers last?
With proper application and care, DTF transfers can last for years. I have shirts that have been worn and washed regularly for over two years with no visible fading or cracking.
Can I stretch DTF prints?
Yes, DTF transfers are flexible and can stretch with the fabric without cracking, as long as they are applied correctly and the fabric itself is stretchable.
Do I need a special printer for DTF?
You need a printer that uses DTF inks and a powder shaker. Many people modify Epson printers for DTF, but you can also buy dedicated DTF printers.
Can I use DTF transfers on dark garments?
Absolutely. DTF transfers include a white ink layer that makes colors pop on dark fabrics. No need for a separate white underbase.
What is the best temperature for pressing DTF transfers?
Most DTF transfers press at 325°F to 350°F (160°C to 175°C). However, always check the instructions from your transfer supplier, as formulations can vary.
DTF transfers have revolutionized the way we decorate apparel. With their versatility, durability, and ease of use, they are an excellent choice for both beginners and professionals. I hope this guide helps you get started or improve your technique. If you have any questions, feel free to reach out.