
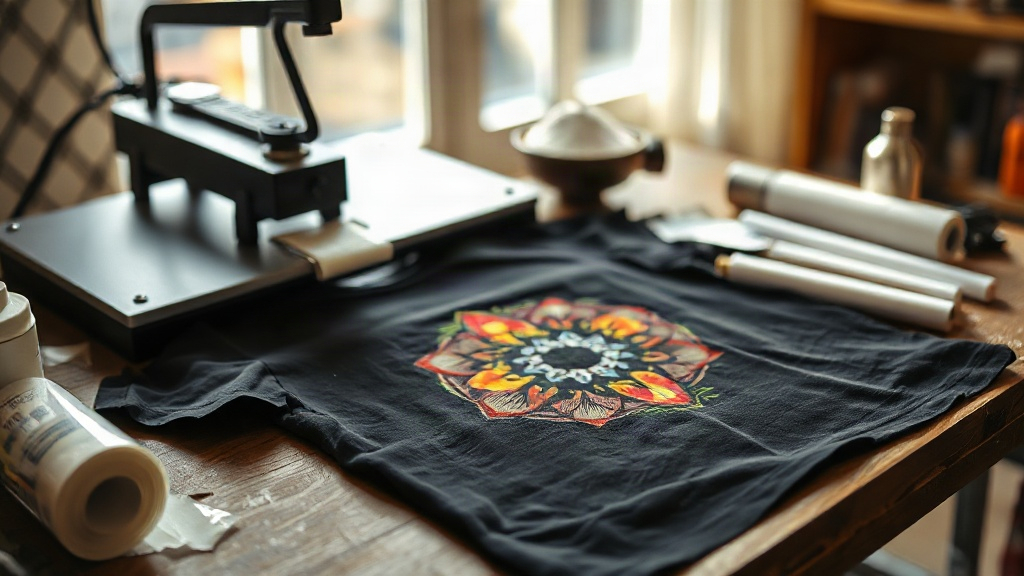
If you have spent any time in the custom apparel world lately, you have probably heard the term DTF thrown around. Short for Direct to Film, this printing method has quickly become a favorite for small shops, side hustlers, and even large production houses. Unlike older techniques that require specific fabrics or expensive setup, DTF opens the door to printing on almost anything with incredible detail and color. In this guide, I will walk you through exactly how DTF transfer printing works, what you need to get started, and the practical tips I have picked up from running my own prints.
What Exactly Is DTF Printing?
DTF stands for Direct to Film. The process involves printing your design onto a special film using a DTF printer, then applying a powder adhesive to the wet ink, and finally curing the film. Once cured, the transfer is ready to be heat pressed onto a garment. The magic is that the design sits on top of the fabric as a flexible, stretchy layer that bonds permanently.
What sets DTF apart from other methods like screen printing or DTG (Direct to Garment) is its versatility. You can print on cotton, polyester, blends, nylon, leather, and even some treated plastics. There is no need for pre-treatment or special coatings. That means you can order a batch of blank hoodies from any supplier and start printing immediately.
How the DTF Process Works Step by Step
Understanding the workflow helps you troubleshoot and improve your results. Here is the typical sequence from computer to finished shirt.
1. Design Preparation
Everything starts with a digital file. You will want a high-resolution image, ideally with a transparent background if you want the garment color to show through. I always work in CMYK color mode because DTF printers use CMYK plus white ink. The white ink acts as a base layer, allowing the colors to pop on dark fabrics. If your design has fine details or gradients, DTF handles them beautifully, much better than vinyl or screen printing for complex art.
2. Printing onto Film
The printer lays down a layer of white ink first, followed by the CMYK colors on top. This order is crucial. The white ink is actually printed behind the colors so that when you transfer it, the white sits against the fabric and the colors face outward. The film itself is a thin, clear PET sheet. You will see your design mirrored on the film, which is normal. The printer uses specialty DTF ink that is formulated to be flexible and durable.
3. Powdering and Curing
While the ink is still wet, you sprinkle a thermoplastic powder over the film. The powder sticks only to the ink. Then you shake off the excess and cure the film in an oven or under a heat source. The powder melts and creates a adhesive layer that will bond to the fabric during heat pressing. This step is what gives DTF transfers their stretch and wash resistance. I use a dedicated curing oven, but some people use a heat press with a special setup. The key is to reach the right temperature without scorching the film.
4. Heat Pressing onto the Garment
Once cured, the transfer is ready. You place it on your garment with the design facing up, cover it with a protective sheet, and press. Typical settings are around 325°F (160°C) for 10-15 seconds with medium pressure. After pressing, you peel the film off while it is still warm (or cold, depending on the film type). The result is a smooth, vibrant print that feels like part of the fabric.
Why Choose DTF Over Other Printing Methods?
There are several reasons DTF has exploded in popularity. Let me break down the main advantages.
- No color limitations: You can print full-color photographs, gradients, and fine lines without extra cost. Screen printing charges per color, but DTF is a single pass.
- Fabric versatility: Works on cotton, polyester, blends, and even non-fabric items like canvas bags or mousepads.
- No minimums: You can print one shirt or one hundred. There is no setup fee, making it perfect for custom orders.
- Durability: When applied correctly, DTF prints survive dozens of washes without cracking or fading. I have shirts that have been through the laundry for over a year and still look great.
- Soft feel: Unlike thick plastisol transfers, DTF has a thin, flexible hand that does not feel rubbery.
Of course, there are some trade-offs. The process requires a dedicated printer, powder, and curing equipment, which can be a bigger upfront investment than a heat press and vinyl cutter. But if you are doing volume or complex designs, DTF pays for itself quickly.
Common Mistakes and How to Avoid Them
When I first started with DTF, I made plenty of errors. Here are the ones I see most often and how to fix them.
Insufficient Powder Application
If you do not apply enough powder, the transfer will not adhere properly and may peel after a few washes. You want a uniform, snowy layer over the wet ink. Shake off the excess gently, but do not be shy with the initial coating. A good tip is to use a powder shaker that distributes evenly.
Wrong Press Settings
Too much pressure can cause the ink to spread and lose detail. Too little pressure and the transfer will not bond. I recommend starting with medium pressure and adjusting based on your press. Also, make sure your garment is flat and free of wrinkles. A pressing pillow helps with seams and zippers.
Peeling Too Soon or Too Late
Most DTF films are designed for warm peel, but some are cold peel. Always check the instructions for your specific film. If you peel too early, the design may stretch. Too late, and it might tear. I keep a timer and follow the recommended wait time precisely.
Ignoring Humidity and Storage
DTF film and powder are sensitive to moisture. Store them in a cool, dry place. If your powder gets clumpy, it will not adhere properly. I keep my powder in an airtight container with a desiccant pack.
DTF vs. DTG vs. Screen Printing: A Quick Comparison
To help you decide if DTF is right for your project, here is a side-by-side look at the three most common methods.
- DTF: Best for full-color, detailed designs on any fabric. No pre-treatment. Low minimums. Requires printer and curing.
- DTG: Best for 100% cotton. Requires pre-treatment. Great for photographic prints but can be less vibrant on dark shirts. Higher cost per shirt for small runs.
- Screen Printing: Best for large runs of simple designs with few colors. Lowest cost per unit at scale, but setup costs and color limitations.
For a custom shop that offers one-off shirts or intricate artwork, DTF is often the most flexible and cost-effective choice.
Getting Started with DTF: What You Need
If you are ready to dive into DTF, here is a basic equipment list.
- A DTF printer (Epson or Ricoh conversions are popular)
- DTF ink (CMYK plus white)
- DTF film (PET film, usually 13" or 17" rolls)
- Thermoplastic powder (fine or medium grade)
- Powder shaker or applicator
- Curing oven or heat press with curing capability
- Heat press for application
- Protective sheets and parchment paper
You can also buy pre-printed DTF transfers from suppliers if you want to test the waters before investing in a printer. That is actually how I started, and it helped me understand the process before committing to equipment.
Frequently Asked Questions About DTF
How long do DTF prints last?
With proper application and care, DTF prints can last as long as the garment itself. I have shirts that have been washed and dried over 50 times with no noticeable fading or cracking. To maximize longevity, wash inside out in cold water and avoid ironing directly on the print.
Can I use DTF on dark shirts?
Absolutely. In fact, DTF excels on dark fabrics because the white ink base layer makes colors vibrant. You do not need to change your design for light or dark garments.
Do I need a special printer for DTF?
Yes, you need a printer that is converted for DTF use. Standard inkjet printers will not work because they lack white ink channels and the ability to handle DTF ink. However, you can buy pre-made transfers from many suppliers if you do not want to invest in a printer yet.
Is DTF more expensive than vinyl?
For simple one-color designs, vinyl can be cheaper. But for full-color, complex designs, DTF is far more cost-effective because there is no weeding or layering. The cost per print drops significantly with volume.
What fabrics work best with DTF?
DTF works on almost any fabric, but it bonds best to cotton and cotton blends. Polyester also works well, though you may need to adjust press settings slightly. Avoid using it on fabrics with a heavy waterproof coating, as the adhesive may not stick.
DTF has truly changed the game for custom apparel. Whether you are a hobbyist or a growing business, understanding the process and avoiding common pitfalls will set you up for success. Grab some film, fire up your printer, and start creating.