DTF transfer size is a crucial consideration for anyone printing designs onto fabrics using Direct-to-Film (DTF) technology. Choosing the right size helps you follow a consistent DTF print size guide, preserve edge sharpness, and achieve color accuracy. An ideal DTF transfer size also supports a balanced t-shirt transfer size, preventing distortion on different garment cuts. Also align with DTF transfer dimensions and DTF design size recommendations to maintain legibility on chest logos or full-back graphics. In this guide, we’ll cover practical steps to measure ribs, seams, and safe zones so your designs print crisp every time.
Around the idea of sizing your design for textiles, thinkers speak of the print footprint, imprint area, or carrier dimensions instead of a single numeric size. By using alternative terms such as transfer footprint, garment print area, and image scale, you align with LSI principles to cover related concepts like placement, resolution, and fabric curvature. Understanding these related terms helps you translate a design’s width and height into practical measurements for center chest, back, or sleeve placements. This broader vocabulary supports consistent results across different apparel styles and printing workflows.
DTF transfer size: The cornerstone of crisp edges and color accuracy
DTF transfer size determines how wide and tall your image will be when pressed, directly influencing edge sharpness and color fidelity. Getting the right size ensures a professional finish that withstands washing and wear. To preserve fine detail, design for 300 PPI at the final print size, or switch to vector artwork for scalable edges when enlarging.
In practice, the size you choose affects readability and visual impact. Large back graphics demand ample space to maintain legibility, while front chest logos must remain instantly recognizable. Remember that garment anatomy—curves, seams, and slope—can distort oversized transfers, so sizing decisions should account for the specific fabric and garment shape.
DTF transfer sizing: Aligning artwork with garment type and placement
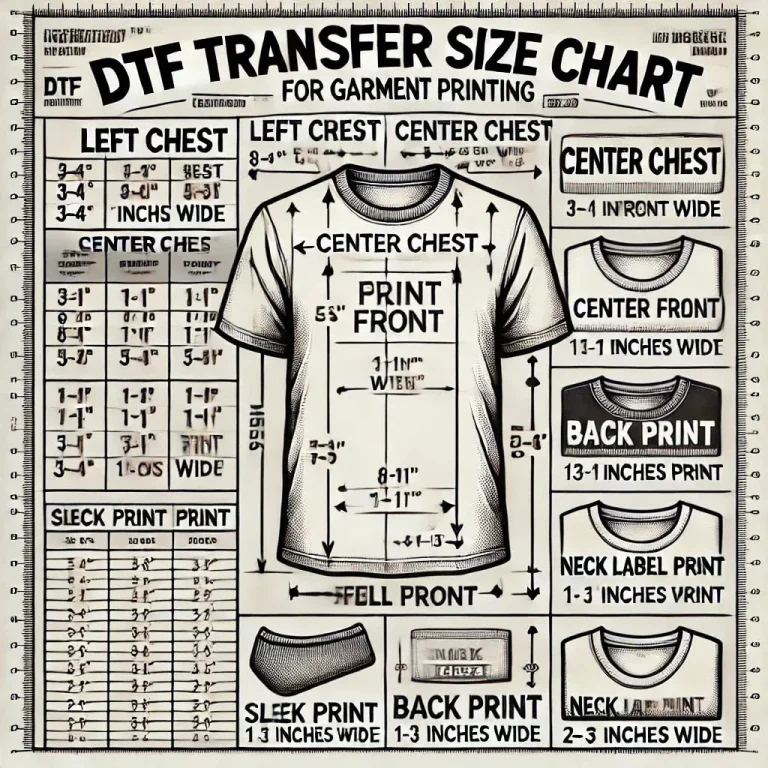
DTF transfer sizing is about matching artwork to the garment and its placement. For T-shirts (unisex and ladies’ fits), front designs typically range from 8–12 inches wide, while back designs often run 12–16 inches wide; hoodies may sit slightly lower with back designs in the 10–14 inch range. This sizing framework keeps visuals balanced across product lines.
Placement matters just as much as width and height. A design that looks great on a flat layout can wrap strangely on a curved surface or near seams. Respect safe zones, consider the neck and shoulder areas, and be ready to adjust width or height to prevent distortion when pressed on different garment shapes.
DTF transfer dimensions: Planning layouts with a practical guide
Using the DTF print size guide helps you translate ideas into practical transfer dimensions. Start with common placements—center chest or full-back—and apply typical widths (8–12 inches for chest, 12–16 inches for back). Add a 0.25-inch bleed and aim for a 3–4% margin to accommodate press alignment and avoid edge color bleed.
The right dimensions also depend on resolution. If you need a larger print, ensure your artwork remains at 300 PPI or convert to vector to preserve edge crispness. When scaling down, verify legibility and color depth remains intact. Mockups and real-world tests help confirm that the chosen dimensions work across garment sizes.
DTF design size recommendations for common products
DTF design size recommendations guide product-wide consistency. For T-shirts, front chest designs typically span 8–12 inches in width, while back designs reach 12–16 inches; heights are adjusted to maintain proportional balance with the torso. Hoodies often use a back width of 10–14 inches to account for bulk and torso length.
Smaller items like caps and accessories require compact scales. Logo placements on caps usually stay within 1–3 inches in diameter. Create size variants (small, medium, large) for each design family to streamline production while preserving the intended visual hierarchy and margins near seams.
Measuring, testing, and validating DTF transfer size
A practical workflow starts with precise measurements. Define the garment type and placement, then measure the target area—center chest, back panel, or sleeve—and apply a consistent bleed (about 0.25 inches). Ensure your design width and height align with the garment’s safe zones and curvature.
Validation comes from real-world tests. Produce a sample on a garment with similar fabric and color, then inspect alignment, edge sharpness, and color density. If needed, adjust the scale and re-test. Maintaining a library of size presets helps keep future runs consistent across product lines.
Common mistakes and best practices for consistent DTF transfer sizing
Common mistakes include overly large designs on small garments, logos that are too tiny to read on busy fabrics, and ignoring fabric texture, which can dull colors or blur edges. Relying on a single print size for all products also leads to misalignment with different garment shapes and placements.
Best practices to avoid these issues include using safe zone marks in the design file, creating size variants (small, medium, large) for each artwork, and keeping master files high-resolution or vector. Always run test prints on similar fabrics and document size presets for team-wide consistency and faster production planning.
Frequently Asked Questions
What is DTF transfer size and why does it matter for print quality?
DTF transfer size defines the width and height of the image footprint pressed onto fabric. Choosing the right DTF transfer size ensures crisp edges, accurate colors, and durable results. For best results, design at 300 PPI for the final size, use vector art for scalable designs, and leave a 0.25 inch bleed within the garment’s safe zone. Common sizes include center chest 8–12 inches wide and back designs 12–16 inches wide.
How do I use a DTF print size guide to determine the right T‑shirt transfer size?
A DTF print size guide maps placements to typical dimensions, helping you pick the right t-shirt transfer size. For a center chest logo on a T‑shirt, start with 8–12 inches wide; back prints are often 12–16 inches. Adjust the height to maintain balance and ensure readability, while checking your printer and garment constraints.
What are standard DTF transfer dimensions for common garment placements?
Common DTF transfer dimensions include: center chest 8–12 inches wide; back 12–16 inches wide; sleeve 3–6 inches wide. Always add a 0.25 inch bleed margin and ensure artwork is 300 PPI at the final size or use vector art to preserve edge sharpness.
What are DTF design size recommendations for different garments (tees, hoodies, caps)?
DTF design size recommendations vary by garment: T‑shirts typically 8–12 inches for front chest and 12–16 inches for back; Hoodies/back designs 10–14 inches and chest 6–10 inches; Caps logos 1–3 inches in diameter. Adapt the size to garment proportions and placement while maintaining legibility.
Can I resize a DTF transfer after it’s created without losing quality?
Yes, but quality depends on the file type. If you upscale, use vector artwork or redraw to preserve edges; if you stay raster, design at 300 PPI at the final print size. Resizing down is usually feasible, but verify legibility and color depth after scaling.
What common mistakes should I avoid when selecting DTF transfer size?
Common mistakes include oversized designs on small garments, tiny logos on busy fabrics, ignoring fabric texture, and using a single size for all designs. To avoid these, follow DTF transfer sizing guidelines, respect safe zones and margins, test on similar garments, and maintain size presets for consistency.
| Key Point | Summary | Details / Examples |
|---|---|---|
| What is DTF transfer size? | Defines how wide and tall the image will be on the garment. | Influenced by garment type, placement (center chest, back, sleeve), artwork resolution, heat press capabilities, and transfer film. Incorrect size can cause distortion. |
| Why size matters (image clarity) | Larger designs require higher resolution to avoid pixelation. | If the design is too large for the print area, detail is lost or scaling down alters composition. |
| Why size matters (readability & impact) | Size affects how quickly and clearly a viewer recognizes the design. | Front chest logos or full-back graphics should be legible at a glance; size drives recognition. |
| Why size matters (garment anatomy) | Different garments have safe zones and curvature that influence fit. | A size that works for a T-shirt may be unsuitable for hoodies or long sleeves due to chest height, shoulders, and sleeve position. |
| Why size matters (durability & washability) | Proper sizing reduces edge stress during washing and helps colors stay vibrant. | Prevents peeling and edge wear when garments are laundered. |
| Measuring your design area | Key approach to accuracy |
|
| Size guidelines by garment type | Typical width ranges by garment type |
|
| DTF transfer sizing strategies | Principles to guide decisions |
|
| Step-by-step: Choosing the right size | A practical workflow |
|
| Common mistakes to avoid | Common pitfalls in sizing |
|
| Design tips & best practices | Guidelines to ensure consistency |
|
| Practical examples & templates | Illustrative cases |
|
| Templates & tools | Starting points and aids |
|
Summary
Conclusion

